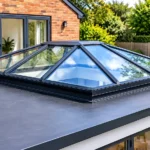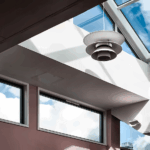




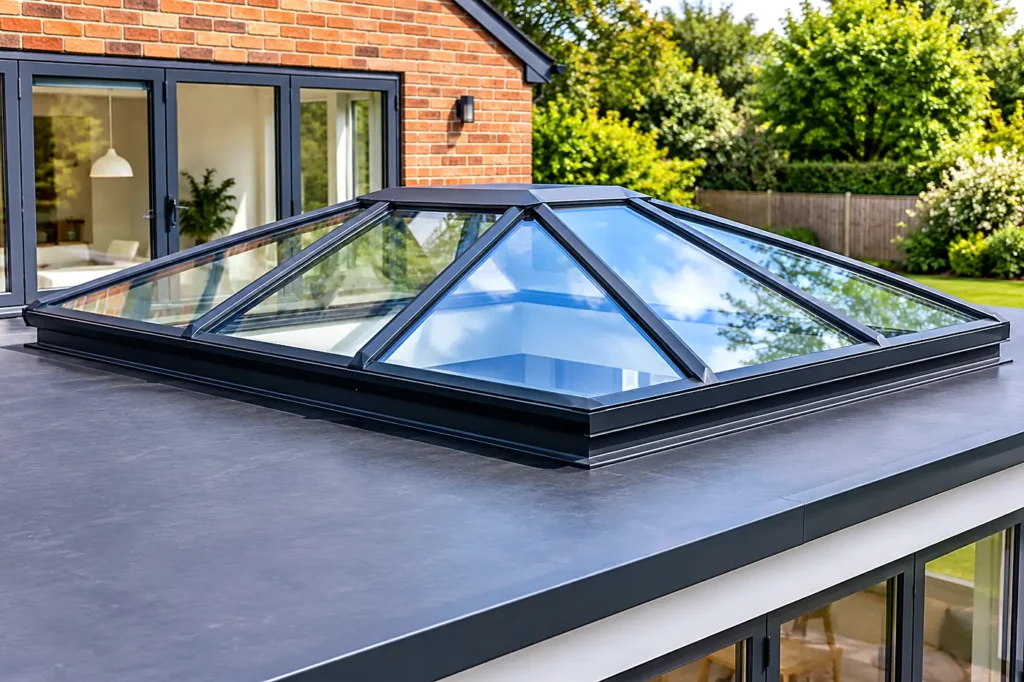
Roof lanterns are an increasingly popular feature in UK homes, particularly in kitchen extensions, open-plan living areas and contemporary renovations. Designed to introduce natural daylight from above, a roof lantern can make a room feel brighter, more spacious and more inviting while creating an attractive architectural focal point.
However, installing a roof lantern on a flat roof requires careful planning, accurate measurements, suitable structural support and effective waterproofing. Whether you are building a new extension or replacing an existing roof lantern, understanding the installation process can help you make informed decisions and achieve a durable, weather-resistant finish.
At the National Window Store, homeowners can explore roof lantern options designed to enhance modern living spaces. Choosing the right roof lantern and ensuring it is installed correctly are important steps towards improving natural light, comfort and the overall appearance of your property.
What to Consider Before Installing a Roof Lantern
Before starting a roof lantern installation, assess your property, roof structure and project requirements. Although some homeowners may consider a DIY approach, roof alterations and glazing installations can involve significant structural and safety considerations.
1. Assess Your DIY Skills and Experience
Installing a roof lantern is more complex than many standard DIY projects. The work may involve cutting through a roof, constructing a supporting frame, handling heavy glazed components and creating watertight connections.
If you do not have experience in carpentry, roofing or structural alterations, hiring qualified professionals is generally the safer option. Incorrect installation can lead to water ingress, heat loss, damage to the roof structure or problems with the glazing.
2. Decide Whether You Are Replacing or Installing a New Roof Lantern
Replacing an existing roof lantern may allow you to use some of the original roof opening, provided the supporting structure remains suitable and the new product is compatible.
Installing a roof lantern in a new location is usually more involved. It may require creating a new opening, reinforcing the roof and adapting the internal ceiling.
In either situation, the roof should be inspected before work begins to identify potential structural issues and establish the correct installation requirements.
3. Choose the Right Position for Natural Light
The location and orientation of a roof lantern can influence the amount of daylight entering your home.
A south-facing roof lantern may receive substantial direct sunlight, while a north-facing installation can provide softer, more consistent daylight. East-facing designs can capture morning sunshine and west-facing installations can introduce afternoon and evening light.
The best position depends on your room layout, surrounding buildings, roof orientation and the level of solar gain you want. Consider overheating and glare as well as the benefits of increased natural light.
4. Check Planning Permission and Building Regulations
Many roof lantern installations form part of permitted development, but this is not guaranteed. Planning requirements can vary depending on the property, the scale of the alteration, local restrictions and whether the building is listed or located in a conservation area.
Building Regulations may also apply, particularly where the work affects structural stability, energy efficiency, ventilation, fire safety or the overall performance of the roof.
Before proceeding, check the relevant requirements with your local planning authority or a qualified building professional. Requirements can differ across England, Wales, Scotland and Northern Ireland.
5. Inspect the Existing Roof Structure
A roof lantern must be supported by a suitable structural opening. The existing joists, roof deck and surrounding framework should be assessed to determine whether they can accommodate the proposed design.
Larger roof lanterns may require additional structural support or alterations to the roof framing. These changes should be designed and carried out by appropriately qualified professionals.
6. Select a Suitable Roof Lantern
Roof lanterns are available in different sizes, configurations, frame finishes and glazing specifications. When comparing options, consider:
- The dimensions and shape of the roof opening.
- The amount of natural light required.
- Thermal performance and energy efficiency.
- Glazing safety and relevant building standards.
- Frame design and compatibility with the property.
- Manufacturer installation instructions and warranty requirements.
National Window Store provides a starting point for exploring roof lantern solutions suited to different home improvement projects. Selecting a product that matches your roof design and installation requirements can help simplify the process.
What Materials and Equipment Are Needed?
The materials required will depend on the roof construction, the roof lantern system and the manufacturer’s installation instructions. A professional installer will typically assess the following components before starting work.
Potential materials include:
- The roof lantern and its specified fixing components.
- Structural timber or other approved framing materials.
- Suitable roof deck materials.
- Compatible waterproofing membranes or roofing underlay.
- Roofing materials and compatible flashing components.
- Approved sealants, fixings and weatherproofing accessories.
- Insulation and internal finishing materials.
- Plasterboard and finishing products, where required.
Tools and access equipment may include measuring equipment, appropriate cutting tools, drills, fixings equipment and suitable access platforms.
Personal protective equipment (PPE), edge protection and safe methods for handling glass are essential. Heavy glazed components should be lifted using appropriate equipment and trained personnel rather than handled without assistance.
Always follow the roof lantern manufacturer’s specifications instead of relying on a generic list of materials.
How to Install a Roof Lantern on a Flat Roof
Although installation methods vary between products, the following stages explain the general process involved in fitting a roof lantern to a flat roof.
Step 1: Measure and Prepare the Roof Opening
Accurate measurements are essential before the roof lantern is ordered or installed. The required opening dimensions must correspond to the manufacturer’s specifications, including any supporting kerbs or upstands.
For a new installation, the roof structure must be assessed and the opening carefully planned. For a replacement, the existing lantern and surrounding materials may need to be removed before the supporting structure can be inspected.
Cutting through roof joists or other structural components without an appropriate design can compromise the building’s stability. Structural alterations should therefore be planned and undertaken by competent professionals.
Step 2: Construct the Supporting Frame
The roof lantern needs a stable, level and suitably sized supporting structure. Depending on the system, this may involve a prepared structural opening or a purpose-designed kerb or upstand.
The support must comply with the product requirements and accommodate the weight of the glazing, wind loads and other relevant forces.
Incorrect dimensions or an uneven frame can affect alignment, fixing security and the performance of seals. The supporting structure should be checked carefully before the lantern is lifted into position.
Step 3: Prepare the Flat Roof Waterproofing
Waterproofing is one of the most important aspects of a successful roof lantern installation.
The existing roof covering must be prepared so that it can connect correctly with the new installation. The appropriate method will depend on whether the roof uses a single-ply membrane, felt, liquid-applied waterproofing or another roofing system.
Compatible waterproofing materials and detailing should be used around the supporting upstand. Poorly executed junctions can allow rainwater to penetrate the roof and cause damage to the ceiling, insulation and surrounding structure.
Step 4: Position and Secure the Roof Lantern
Once the supporting structure and roof preparation have been checked, the roof lantern can be carefully positioned.
The installer must follow the manufacturer’s instructions for lifting, alignment, fixing and sealing. The frame should sit correctly on the prepared support, with all specified fixings installed in the required locations.
Because roof lanterns contain glazed components that may be heavy and fragile, appropriate lifting equipment and safe handling procedures are essential.
Do not improvise fixing arrangements or modify the frame unless the manufacturer and relevant design requirements expressly allow it.
Step 5: Install Flashing and Complete the Weatherproofing
The roof lantern’s perimeter must be integrated with the roof covering to prevent water ingress.
Depending on the product and roofing system, this may involve proprietary flashing components, membrane upstands and compatible sealing details. These components should be installed in the correct sequence to direct rainwater away from vulnerable joints.
Particular attention should be given to corners, edges and transitions between different materials. All connections must follow the manufacturer’s specifications and the requirements of the roof covering.
Step 6: Fit the Glazing and Check the Seals
Some roof lantern systems arrive with glazing already incorporated into the frame, while others require glazing to be fitted during installation.
The installation method will depend on the product design. Glass must be handled correctly, supported as specified and secured using the designated components.
The installer should check that the glazing is correctly seated, that seals are continuous and that all specified caps, gaskets and finishing components are in place.
Step 7: Complete the Internal Finishing
Once the external installation has been completed, internal work may be required around the opening.
This can include insulation, plasterboard, plastering and decorating. If the roof lantern is installed above a ceiling with a separate void or loft space, a suitably designed light shaft may be necessary to connect the opening with the room below.
The internal finish should maintain appropriate insulation and airtightness, helping to reduce unwanted heat loss and the risk of condensation.
Step 8: Inspect the Completed Installation
Before the project is signed off, the installation should be checked against the manufacturer’s requirements and relevant building standards.
The inspection should cover the security of the frame, glazing, fixings, waterproofing, insulation and internal finish. Any drainage provisions associated with the roof design should also be checked.
Waterproofing should be assessed using appropriate methods that do not risk damaging the roof or glazing. Keep installation documentation, product information and warranty details for future reference.
Common Roof Lantern Installation Mistakes to Avoid
Even a high-quality roof lantern can perform poorly if it is installed incorrectly. Understanding common mistakes can help homeowners plan their projects more effectively.
Incorrect Measurements
An opening that is too large, too small or out of square can create installation difficulties and compromise the fit. Confirm all dimensions against the manufacturer’s specifications before structural work begins.
Inadequate Structural Support
Roof lanterns place loads on the surrounding roof structure. Failing to provide suitable support can result in movement, damaged finishes or more serious structural problems.
Poor Waterproofing
Gaps, incompatible materials and incorrectly installed flashing can allow water to enter the roof. Proper detailing at the junction between the lantern and the flat roof is essential.
Neglecting Insulation and Airtightness
An installation that does not maintain suitable insulation and airtightness may contribute to heat loss, draughts and condensation. Thermal performance should be considered throughout the installation rather than addressed only during internal finishing.
Ignoring Safe Working Practices
Working at height and handling large panes of glass can be hazardous. Appropriate access equipment, edge protection, PPE and trained installers are essential for reducing risk.
Do Roof Lanterns Require Planning Permission in the UK?
Planning permission requirements depend on the property and the nature of the work.
A roof lantern installed as part of an extension may fall within permitted development rights if all applicable conditions and limitations are met. However, restrictions can apply to listed buildings, designated areas and properties subject to particular planning controls.
Building Regulations are a separate consideration. Even where planning permission is not required, the installation may need to meet applicable standards for structural safety, thermal performance and other aspects of building work.
Homeowners should confirm the position with their local planning authority and building control service before construction begins. Where necessary, obtain professional advice on the proposed design.
How Much Does It Cost to Install a Roof Lantern?
The total cost of a roof lantern installation varies according to the size and specification of the product, the complexity of the roof and the amount of building work required.
Factors that can influence the overall price include:
- The roof lantern’s dimensions, design and glazing specification.
- The condition of the existing roof.
- Whether a new structural opening is required.
- The need for additional framing or reinforcement.
- Waterproofing and roof-covering alterations.
- Access equipment and specialist lifting requirements.
- Internal insulation, plastering and decorating.
- Professional installation and building control costs, where applicable.
Replacing a compatible existing roof lantern may involve less structural work than installing a completely new one. However, hidden defects or outdated waterproofing can affect the final cost.
For a more reliable estimate, obtain a detailed quotation covering the roof lantern, installation, structural alterations, finishing work and any necessary approvals.
Can You Install a Roof Lantern Yourself?
DIY installation may appear to offer savings, but it is not suitable for every homeowner or roof lantern system.
The work can involve structural alterations, working at height, handling heavy glazing and creating weatherproof roof junctions. Mistakes may result in costly repairs or affect the product warranty.
A professional installation is generally advisable if you lack experience with roofing and structural work. Before appointing an installer, check their relevant experience, insurance, references and familiarity with the specific roof lantern system.
Confirm who is responsible for structural work, waterproofing, building control requirements and warranty documentation.
Why Choose a Quality Roof Lantern for Your Home?
A well-designed roof lantern can transform the appearance and functionality of an extension or renovated living space.
Benefits include:
- More natural daylight: Helps brighten kitchens, dining rooms and open-plan interiors.
- A greater sense of space: Overhead glazing can make a room feel more open and welcoming.
- Contemporary design: Provides an architectural feature that complements many modern extensions.
- Energy-conscious performance: Suitable glazing and careful installation can help manage heat loss and solar gain.
- Added visual appeal: A thoughtfully selected roof lantern can enhance the overall finish of a home improvement project.
The results depend on the quality of the product, its suitability for the building and the standard of installation.
Explore Roof Lantern Options with National Window Store
Choosing the right roof lantern is an important part of planning a brighter, more attractive living space. From selecting the appropriate dimensions and glazing to checking compatibility with your flat roof, careful preparation can help your project run smoothly.
National Window Store is a useful place to explore roof lantern options for home improvement projects across the UK. When comparing designs, consider the appearance, glazing performance, installation requirements and suitability for your property.
For the best results, pair a suitable roof lantern with professional installation and carefully executed waterproofing. This approach can help you enjoy the benefits of natural daylight while protecting your home against the UK’s changeable weather.
Frequently Asked Questions About Roof Lantern Installation
1. Can a roof lantern be installed on any flat roof?
Not every flat roof is suitable without modification. The structure must provide adequate support and the roof covering must allow a reliable waterproof connection. A professional assessment can establish whether reinforcement or other alterations are necessary.
2. How long does it take to install a roof lantern?
The timescale depends on the size of the lantern, the condition of the roof and whether structural alterations are required. A straightforward replacement may take less time than an installation involving a new opening, reinforcement and internal finishing.
3. Do roof lanterns make a room warmer?
Roof lanterns introduce natural light and solar energy, but the temperature effect depends on the glazing specification, orientation, ventilation and season. Choosing suitable energy-efficient glazing and considering solar control can help manage comfort throughout the year.
4. How can I prevent a roof lantern from leaking?
Correct installation, compatible waterproofing, properly fitted flashing and careful attention to perimeter joints are essential. The roof lantern should be installed according to the manufacturer’s instructions by a competent professional.
5. Is a roof lantern suitable for a kitchen extension?
Yes. Roof lanterns are commonly used in kitchen extensions because they introduce daylight into areas that may otherwise receive limited light from vertical windows. The design should also account for ventilation, solar gain and the room’s layout.
6. Should I replace an old roof lantern?
Replacement may be worth considering if the existing unit is damaged, leaking, difficult to maintain or no longer meets your requirements for thermal performance. Before replacing it, inspect the surrounding roof and supporting structure to identify any underlying problems.
7. Where can I find roof lanterns for my home?
You can explore roof lantern options through the National Window Store and compare designs according to your available roof space, glazing requirements, appearance and installation needs.
Final Thoughts
Installing a roof lantern on a flat roof involves much more than fitting a glazed structure into an opening. Structural support, accurate measurements, effective waterproofing, insulation and safe installation all contribute to long-term performance.
By planning the project carefully, checking the relevant UK requirements and choosing a suitable product, homeowners can create brighter and more appealing interiors. For additional inspiration, explore the roof lantern options available through The National Window Store and seek professional advice to ensure your chosen design is suitable for your property.